
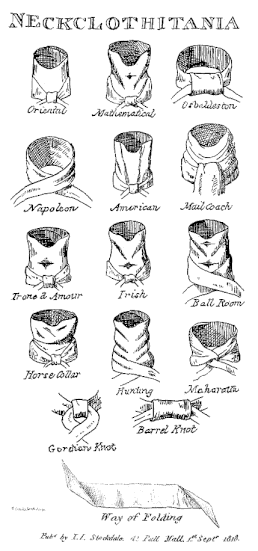
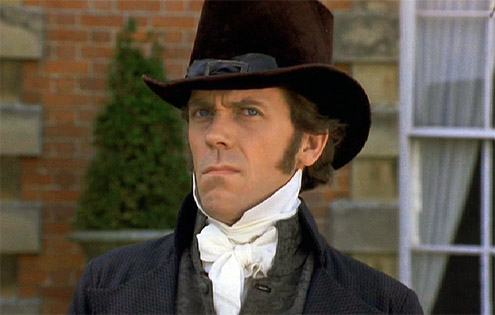
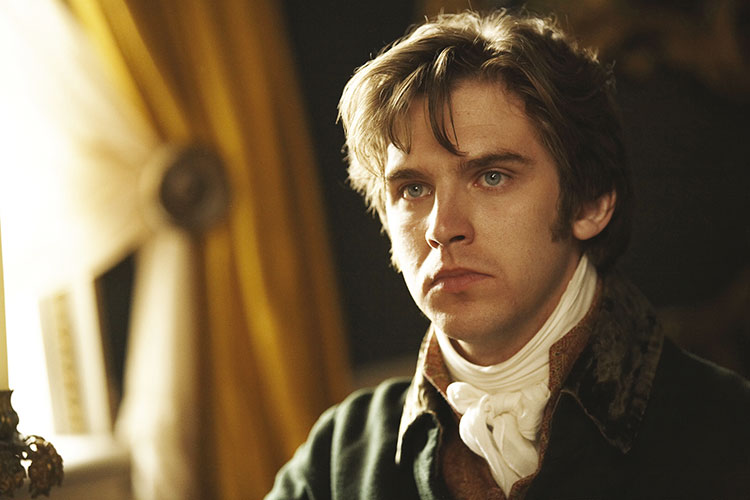
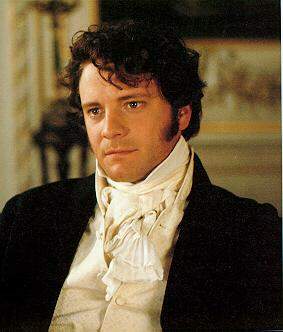
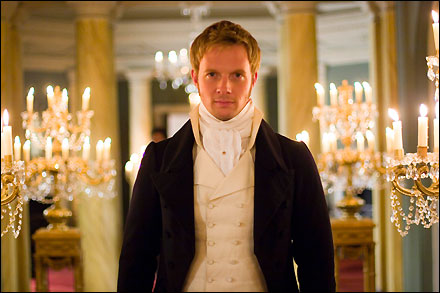
How To Tie A Regency CravatAlthough it was originally written as satire, The Neckclothitania, published in 1818, gives instructions for some of the most popular Regency cravat styles, while including others that were so elaborate they are really quite ridiculous. I've gone through many sources and condensed what I found into 6 distinct cravat styles. Below are step-by-step instructions for each!

|
|
|
Tying a Napoleon Cravat1- Stretch your cloth in front of you with one end in each hand to find the midpoint.
2- Put the midpoint of the cloth on the back of your neck. Bring the ends of the cloth to the front. 3- Cross the ends of the cloth around your neck so that they drape over your shoulder or chest in an "X." 4- Add a brooch or safety pin to the ends to keep them in place or wrap them under the arms and tie them in back. |
Tying a Mail Coach or Waterfall Cravat1- Stretch your cloth in front of you with one end in each hand to find the midpoint.
2- Place the midpoint of the cloth on the front of your neck. Wrap the right side of the cloth around the back of your neck so the right end of the cloth comes out on the left side of your neck, draping over your collarbone. 3- Wrap the left side of the cloth around the back of your neck so that it comes out on the right side. Continue crisscrossing your cloth, layering the cravat so that it covers your entire neck. Leave at least a foot of slack on the ends of the cloth for tying. 4- Bring the ends of the cloth to the front. Place the left end over the right end to create an "X." Pull the end of the top layer of cloth through the hole made at the top of the "X." 5- Tighten the knot at the top of your neck. Arrange the remaining top layer of cloth so that it covers the bottom layer and hides the knot. Spread the top layer of cloth so that it lies flat against your chest. |
|
|
Tying a Barrel Knot Cravat1-Place the length of cravat cloth around your collar so the right side is a bit longer than the left.
2- Create a loose loop with the cloth, right side over the left, and pinch the ends of the loop together in an “X” , leaving two loose ends free. 3- Wrap the right side over once more, creating a loop around the “X”. 4- Pull the loose left side end through the loop you have just made and pull as tightly as desired. 5- Use your fingers to straighten the knot and cravat and position it against your shirt. |
Tying An Osbaldeston Cravat
|
|
|
Tying The Mathematical (or Triangular) Cravat1- Stretch your cloth in front of you with one end in each hand to find the midpoint.
2- Place the midpoint of the cloth on the front of your neck, making three downward facing pleats. 3- Cross the ends of the cloth in back and bring them to the front. 4- cross the right end over the left forming an X and pull the right end through the top so it hangs down 5- Making a loop with the left end, turn the right end under and pull through the loop and tighten. Arrange the knot to sit flat and uncreased. |
Tying The Ballroom Cravat
|
1- Stretch your cloth in front of you with one end in each hand to find the midpoint.
2- Place the midpoint of the cloth on the front of your neck 3- Cross the ends of the cloth in back and bring them to the front. 4- cross the right end over the left forming an X 5- Add a brooch or safety pin to the ends to keep them in place or wrap them under the arms and tie them in back. |
|
